
")
Golf carts are a staple on courses worldwide, providing a convenient and eco-friendly way to get around. However, maintaining these carts, particularly the batteries, is crucial to ensure their longevity and performance. Properly cleaning and maintaining your golf cart batteries can extend their life and keep your cart running smoothly. Here are the top 10 tips for cleaning golf cart batteries, presented in a comprehensive guide.
1. Gather the Necessary Tools and Materials

Before you begin, ensure you have all the necessary tools and materials. Here’s a checklist:
- Safety gloves and goggles
- Baking soda
- Water
- A small brush (an old toothbrush works well)
- A battery cleaning solution (optional)
- Wrenches or pliers
- A battery terminal cleaner or wire brush
- Petroleum jelly or battery terminal protector
Having everything ready will make the process smoother and more efficient.
Read also: How Much Does a Golf Cart Battery Weigh?
2. Prioritize Safety

Safety should be your top priority when cleaning golf cart batteries. Batteries contain sulfuric acid, which can be hazardous. Follow these safety tips:
- Always wear protective gloves and safety goggles to shield your hands and eyes from acid splashes.
- Work in a well-ventilated area to avoid inhaling any harmful fumes.
- Avoid wearing loose clothing or jewelry that could catch on battery terminals.
3. Turn Off the Golf Cart and Disconnect the Batteries

Before you start cleaning, ensure the golf cart is turned off. Then, disconnect the batteries. Begin by disconnecting the negative terminal (usually marked with a minus sign or black color) first, followed by the positive terminal (marked with a plus sign or red color). This sequence prevents any accidental short circuits.
4. Inspect the Batteries

Once the batteries are disconnected, inspect them for any signs of damage or leakage. Look for:
- Cracks or bulges in the battery casing
- Corrosion around the terminals
- Fluid leaks
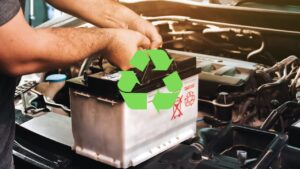
If you notice any severe damage, it might be time to replace the battery rather than just clean it.
5. Clean the Battery Terminals

Battery terminals often accumulate corrosion, which appears as a white or bluish substance. To clean the terminals:
- Prepare a Cleaning Solution: Mix a tablespoon of baking soda with a cup of water to create a cleaning solution. Baking soda neutralizes the acid and helps dissolve corrosion.
- Apply the Solution: Dip a small or old toothbrush into the solution and scrub the terminals and battery posts. Ensure you clean thoroughly to remove all the corrosion.
- Rinse with Water: After scrubbing, rinse the terminals with clean water to remove any residual baking soda solution.
- Dry the Terminals: Use a clean cloth to dry the terminals completely. This step is crucial to prevent any moisture from causing further corrosion.
Read also: How Long Does a Golf Cart Take to Charge?
6. Use a Battery Terminal Cleaner

For a deeper clean, consider using a battery terminal cleaner or a wire brush. These tools are designed to remove stubborn corrosion and provide a better connection between the battery and the terminals. Gently scrub the terminals and posts until they are shiny and free of debris.
7. Clean the Battery Case
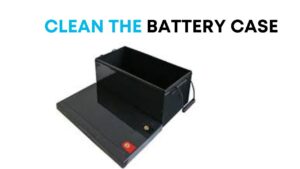
The battery case can also accumulate dirt and grime. To clean it:
- Wipe Down with a Damp Cloth: Use a damp cloth to wipe away any dirt or residue from the battery case. Avoid using excessive water, as it can seep into the battery cells.
- Inspect for Cracks: While cleaning, inspect the battery case for any cracks or damage. A damaged case can lead to leaks and reduced battery life.
8. Apply Petroleum Jelly or Battery Terminal Protector

Once the terminals and case are clean, apply a thin layer of petroleum jelly or a battery terminal protector to the terminals. This step helps prevent future corrosion and ensures a solid electrical connection.
Read also: How Much Are Golf Cart Batteries?
9. Reconnect the Batteries
After cleaning and protecting the terminals, it’s time to reconnect the batteries. Start by connecting the positive terminal (red) first, followed by the negative terminal (black). Ensure the connections are tight but not overly tight, as this can damage the terminals.
10. Regular Maintenance and Inspections
Cleaning your golf cart batteries is not a one-time task. Regular maintenance and inspections are essential to keep your batteries in top condition. Here are some maintenance tips:
- Monthly Inspections: Check the battery terminals and cases for signs of corrosion or damage at least once a month.
- Water Levels: If you have lead-acid batteries, check the water levels regularly and top up with distilled water as needed. Avoid overfilling, as this can cause acid spills.
- Clean Spills Immediately: If you notice any acid spills, clean them immediately using a baking soda solution to neutralize the acid.
- Charge Properly: Follow the manufacturer’s instructions for charging your batteries. Overcharging or undercharging can significantly reduce battery life.
Additional Tips for Prolonging Battery Life
In addition to cleaning, there are several practices you can adopt to prolong the life of your golf cart batteries:
- Avoid Deep Discharges: Try not to discharge the batteries completely before recharging. Deep discharges can shorten the lifespan of lead-acid batteries.
- Store in a Cool, Dry Place: If you’re not using your golf cart for an extended period, store the batteries in a cool, dry place. Extreme temperatures can negatively impact battery performance.
- Use a Battery Charger Maintainer: If you don’t use your golf cart regularly, consider using a battery charger maintainer. This device keeps the battery at an optimal charge level, preventing it from discharging too much.
Common Mistakes to Avoid
When cleaning and maintaining your golf cart batteries, avoid these common mistakes:
- Using Metal Tools on Terminals: Avoid using metal tools to clean the terminals, as they can cause sparks or short circuits. Use plastic or rubber-coated tools instead.
- Neglecting Safety Gear: Always wear protective gear, even if you’re only doing a quick clean. Acid splashes can cause serious injuries.
- Ignoring Corrosion: Even small amounts of corrosion can affect battery performance. Clean it as soon as you notice it.
- Skipping Regular Maintenance: Regular maintenance is key to extending battery life. Don’t skip monthly inspections and cleanings.
Conclusion
Cleaning golf cart batteries might seem like a daunting task, but with the right tools, materials, and procedures, it becomes manageable. Regular cleaning and maintenance not only extend the life of your batteries but also ensure your golf cart performs optimally. Follow these top 10 tips to keep your golf cart batteries clean, safe, and efficient.
FAQs:
1. How often should I clean my golf cart batteries?
Clean your golf cart batteries monthly to prevent corrosion and ensure optimal performance.
2. What should I do if I notice severe corrosion on my battery terminals?
Use a mixture of baking soda and water to neutralize and remove severe corrosion. Scrub with a brush, rinse with water and dry thoroughly.
3. Can I use any water to top up my lead-acid batteries?
No, only use distilled water to top up lead-acid batteries. Tap water contains minerals that can damage the battery cells.
4. What are the signs that a battery needs to be replaced instead of just cleaned?
Replace the battery if you notice cracks, severe corrosion, fluid leaks, or consistently low performance.
5. Is it necessary to disconnect the batteries before cleaning them?
Yes, always disconnect the batteries, starting with the negative terminal, to prevent short circuits and ensure safety.

")


")


